Tag Archives: Expectations

15 Design-Friendly Places to Hide the Cat Litter Box

“Where to put the litter box?  It’s tough decision to make since you don’t want it too open, but the cat has to actually get to it.  Here are some interesting ideas that approach things a little differently.”

Denise Buck & Ed Johnson – DC Metro Realty Team

How to Prevent Freezing Pipes & The Cost to Replace Pipes

“As the weather gets cooler now it’s time to not only shut off the water to the outside, but check on things inside to be fully prepared.”

Denise Buck & Ed Johnson – DC Metro Realty Team


Visit houselogic.com for more articles like this.

Copyright 2016 NATIONAL ASSOCIATION OF REALTORS®

5 Garbage Disposal Dos and Don’ts

“Do you know what you shouldn’t put in a Garbage Disposal?  The list is longer than you might think.”

Denise Buck & Ed Johnson – DC Metro Realty Team

Got a garbage disposal or thinking about getting one? Then knowing garbage disposal dos and don’ts is important. They’ll not only help you avoid garbage disposal repairs in the future, but also extend the life of your appliance.

DO: Follow These Simple Tips to Help Unclog Your Disposal

Never pour bleach, drain cleaners or other chemicals into the garbage disposal as they are corrosive and can damage your pipes. Follow these simple tips to unclog your disposal, and if those don’t work, you may need to get it repaired. Thankfully, your American Home Shield® Home Warranty can help protect your budget.

DON’T: “Sharpen” the Blades with Ice or Eggshells

Garbage disposals do not have blades. They have impellers that are not sharp, but blunt. So, putting ice or egg shells down the disposal to sharpen the blades will not do any good. In fact, egg shells are not recommended for the garbage disposal as the membrane can get wrapped around the impellers and cause damage.

DO: Use Cold Water, Not Hot, When the Disposal is Running

While hot water does dissolve grease, it may actually do more harm than good and could actually push grease further into the pipes and create clogs. It could even cause your disposal to overheat. Cold water is better, as it helps grease to solidify and move more easily down the drain with the wastewater.

DON’T: Pour Grease or Food Scrap Down the Disposal

Never pour fats, oil or grease into your disposal or down your sink. Your disposal simply grinds items. Chasing it down with dish soap won’t always work either. Fats, oil and grease can congeal, stick to and build up in plumbing and clog the sewer. Food scraps are best thrown in the trash not in your disposal.

DO: Keep Using Your Trash Can

Although a garbage disposal is durable, it is not indestructible. Disposals are designed to grind down soft food particles, not hard food waste like bones, corn cobs, fruit pits, and un-popped popcorn kernels. A good rule of thumb is if you have a hard time chewing it, your disposal will probably have a hard time grinding it. If you’re not sure about an item, it’s better to throw it in the trash. Avoid dumping other foods like pasta or rice as they expand in water and could clog your drain. Also, avoid starchy or stringy vegetables like celery, rhubarb, asparagus, potato and banana peels and coffee grounds.


Originally published on American Home Shield

Is it Time to Upgrade Your AC?

“Everyone knows it’s expensive to replace the air conditioner, but we all know it needs to be done sometime. So how do you know when it’s the right time?  This article can help you determine just that.”

Denise Buck & Ed Johnson – DC Metro Realty Team

Knowing when to replace your hard-working air conditioner can be tricky. While it’s a major purchase that most people don’t make lightly, nobody wants to wake up to a broken air conditioner on a hot summer day.

There are a lot of factors that go into deciding whether or not it’s time to upgrade your AC. Here are few questions to ask yourself before you start shopping.

4 Questions You Should Ask When Wondering When to Upgrade Your AC Unit  

1. How old is your AC unit?

The age of your unit is the most important factor in deciding whether or not to replace it. A majority of HVAC technicians recommend replacing your AC if it’s 15 years or older. All AC units have a SEER or Seasonal Energy Efficiency Ratio. Today, the minimum SEER is 13, but if your AC was manufactured before 2006, chances are it’s only rated at a 10. Just by upgrading to the current minimum, you’ll gain at least three points on the SEER scale. Each SEER number you go up increases energy efficiency by 5 to 9 percent, so a 15 to 27 percent boost immediately puts money in your pocket in the form of energy savings.

2. How often should you perform HVAC maintenance and repairs?

The problem starts when your AC needs repair more than once a year. The more work your unit undergoes, the shorter its overall lifespan will be and the more likely it is that it will need repair again. Look over your receipts and calculate how much you’ve spent on AC repairs. If the total amount you’ve spent on repairs exceeds the cost of a new unit, it’s definitely time for a new one.

3. Is Your Energy Bill On the Rise?

As it gets older, your heating and air conditioning system may be getting less efficient. If your energy bills increase as the summer progresses, your AC unit may be working harder to cool the same space that it used to — and using more energy than necessary to do the job. When this happens, you’ll see a rise in energy consumption and cost. Upgrading to a new conditioner can reduce energy costs by an average of 20 to 40 percent. The savings you’ll see on your energy bill will help offset the cost of a new AC unit.

4. Is your AC cooling your entire home consistently?

If your air conditioner is having a hard time keeping up with your home’s demand for cool air, that’s a sure sign of trouble. Test this by setting your thermostat to your preferred temperature and walking into different rooms of your home throughout the day. If your AC is still working properly, there shouldn’t be a noticeable change in temperature from room to room. An efficient A/C unit will effectively cool your entire home without as much effort.

Originally published by American Home Shield

Inherited an Antique? Here’s How to Work It Into Your Home

“Sometimes it’s tough to know exactly what to do with an antique, when most of your furniture is more modern.  Here are some ideas on how to work them into the rest of your decor.”
Denise Buck & Ed Johnson – DC Metro Realty Team
It’s wonderful to be given heirloom textiles, cherished ceramics or an old artwork. Antiques have a history and quality worth showcasing, but it can sometimes be hard to make them work with modern decor. Here are some effective ways to incorporate inherited pieces into your home and show them off to their full potential.
Originally Published on HOUZZ by Becky Clarke

A Moving Checklist


A Moving Checklist!

A Moving Checklist!

“Here is a great article that we found on ‘Real Simple’ that could help alleviate some of the stress that comes with moving.  Following this Step by Step guideline can help you make sure everything has been thought of and taken care of.”  

Denise Buck & Ed Johnson – DC Metro Realty Team


Two Months Before

  • Sort and purge – Go through every room of your house and decide what you’d like to keep and what you can get rid of. Think about whether any items will require special packing or extra insurance coverage.
  • Research – Start investigating moving company options. Do not rely on a quote over the phone; request an on-site estimate. Get an estimate in writing from each company, and make sure it has a USDOT (U.S. Department of Transportation) number on it if you are moving to a different state. If you’re moving within a state, some states require a USDOT number, check here to see if your state does. You can also check with your state’s public utilities commission, moving association, or Better Business Bureau.
  • Create a moving binder – Use this binder to keep track of everything—all your estimates, your receipts, and an inventory of all the items you’re moving.
  • Organize school records – Go to your children’s school and arrange for their records to be transferred to their new school district.

Six Weeks Before

  • Order supplies – Order boxes and other supplies such as tape, Bubble Wrap, and permanent markers. Don’t forget to order specialty containers, such as dish barrels or wardrobe boxes.
  • Use it or lose it – Start using up things that you don’t want to move, like frozen or perishable foods and cleaning supplies.
  • Take measurements – Check room dimensions at your new home, if possible, and make sure larger pieces of furniture will fit through the door.

One Month Before

  • Choose your mover and confirm the arrangements – Select a company and get written confirmation of your moving date, costs, and other details
  • Begin packing – Start packing the things that you use most infrequently, such as the waffle iron and croquet set. While packing, note items of special value that might require additional insurance from your moving company. Make sure to declare, in writing, any items valued over $100 per pound, such as a computer.
  • Label – Clearly label and number each box with its contents and the room it’s destined for. This will help you to keep an inventory of your belongings. Pack and label “essentials” boxes of items you’ll need right away.
  • Separate valuables – Add items such as jewelry and important files to a safe box that you’ll personally transport to your new home. Make sure to put the mover’s estimate in this box. You’ll need it for reference on moving day.
  • Do a change of address – Go to your local post office and fill out a change-of-address form, or do it online at usps.gov. But in case there are stragglers, it’s always wise to ask a close neighbor to look out for mail after you’ve moved. Check in with him or her two weeks after the move, and again two weeks after that.
  • Notify important parties – Alert the following of your move: banks, brokerage firms, your employer’s human resources department, magazine and newspapers you subscribe to, and credit card, insurance, and utility companies.
  • Forward medical records – Arrange for medical records to be sent to any new health-care providers or obtain copies of them yourself. Ask for referrals.

Two Weeks Before

  • Arrange to be off from work on moving day – Notify your office that you plan to supervise the move and therefore need the day off.
  • Tune up – Take your car to a garage, and ask the mechanic to consider what services might be needed if you’re moving to a new climate.
  • Clean out your safe-deposit box – If you’ll be changing banks, remove the contents of your safe-deposit box and put them in the safe box that you’ll take with you on moving day.
  • Contact the moving company – Reconfirm the arrangements.

One Week Before

  • Refill prescriptions – Stock up on prescriptions you’ll need during the next couple of weeks.
  • Pack your suitcases – Aim to finish your general packing a few days before your moving date. Then pack suitcases for everyone in the family with enough clothes to wear for a few days.

A Few Days Before

  • Defrost the freezer – If your refrigerator is moving with you, make sure to empty, clean, and defrost it at least 24 hours before moving day.
  • Double-check the details – Reconfirm the moving company’s arrival time and other specifics and make sure you have prepared exact, written directions to your new home for the staff. Include contact information, such as your cell phone number.
  • Plan for the payment – If you haven’t already arranged to pay your mover with a credit card, get a money order, cashier’s check, or cash for payment and tip. If the staff has done a good job, 10 to 15 percent of the total fee is a good tip. If your move was especially difficult, you might tip each mover up to $100. Don’t forget that refreshments are always appreciated.

Moving Day

  • Verify – Make sure that the moving truck that shows up is from the company you hired: The USDOT number painted on its side should match the number on the estimate you were given. Additionally, you can check if the moving truck has the company’s branding, or vehicle number that was listed in your confirmation. Scams are not unheard-of.
  • Take inventory – Before the movers leave, sign the bill of lading/inventory list and keep a copy.

9 Tips for Living a (Semi-)Normal Life While Your Home Is Being Shown

“Great tips for when you are trying to sell your home.  This article will be shared on a regular basis with our clients now!”
Denise Buck & Ed Johnson – Dc Metro Realty Team
Selling your house? Those frequent showings can be a real hassle. You know it’s worth it to do your best to accommodate them, but that doesn’t make it any easier! Here are tips to make keeping your house ready to show to prospective buyers more doable, plus a handy checklist of what to remember before you clear out each time — from someone who’s been through the process (and lived to tell the tale).
Originally published on HOUZZ by Laura Gaskill

How Much Paint Do You Need?

“We are always involved in painting projects with our clients and these tips make perfect sense.”
Denise Buck & Ed Johnson – DC Metro Realty Team
My husband and I are avid DIYers, and whenever we start a new project we joke about the number of trips to the home-improvement store it’s going to take to complete the task. A “one-trip job” is considered a smashing success. The unfortunately more common “five-trip job” tends to feel slightly less triumphant.
Originally posted on HOUZZ.com by Jennifer Ott

Myth-Buster: The Right Way to Test Paint Colors

“It’s amazing how you can see the difference when paint is actually on multiple walls in a room to test out how light hits it and the impact of shadows.”  
Denise Buck & Ed Johnson – DC Metro Realty Team
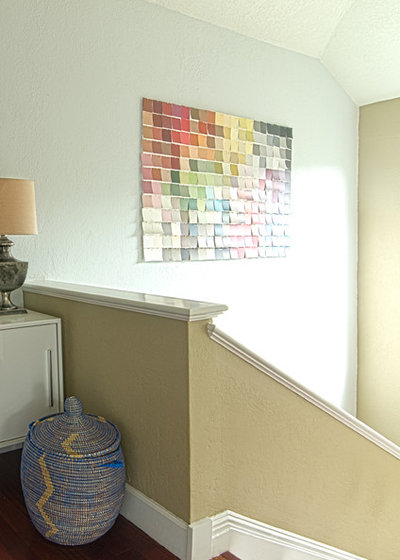
It’s a common image: Someone selecting a wall color paints several sheets of paper or sample boards and hangs them on the wall to compare colors. It looks artistic and even a bit hip, but it may not be the most accurate way to vet wall paint. We talked to five pros, including painters and designers. Here’s what they suggest instead.
Originally Published on HOUZZ by Erin Carlyle

Cooktops vs. Ranges – Which is right for you?

“Thinking about some new appliances for your kitchen?  What makes sense for you?”

Denise Buck & Ed Johnson – DC Metro Realty Team

The centerpiece of your kitchen is your stove and oven. You have a couple options to choose from, cooktops and ranges. What is the difference? Find out here.

Photo by: Shutterstock

Ah, the kitchen. Done right, it’s a sight to behold. But done poorly, it can come back to haunt you. Seemingly trivial differences often end up playing a large role in the room’s success. Today, we’ll focus on the centerpiece itself: Cooktops vs. Ranges.

Understanding the Differences

So what is it exactly that makes a cooktop different from a range? Well, in simple terms, a cooktop ditches the oven portion of a range and takes up only counter space. This means that the burner’s knobs and buttons are on top of the counter, rather than on the front. Of course, if an oven is needed, that means opting for a wall-mounted oven in addition to the cooktop.

A range, on the other hand, is both of these units in one. This means it’s a freestanding appliance that has the burners on top and the oven down below. The knobs and buttons on a range are typically on the front as to not get in the way of the pots and pans while cooking.

There is a third option, however, called a rangetop, which is essentially just a cooktop with the knobs and buttons placed on the front. It typically takes up a little bit more room than a standard, flat cooktop. For our purposes, we’ll group this option in the regular “cooktop” category.

Which type is right for you?

There are many benefits unique to a cooktop, but really it all depends on what your needs are. Is your kitchen cramped or full of space? Do you cook alone or as a team? Do you host large dinner parties? Do you suffer from bad knees or back? The questions are endless, but answering them is crucial when deciding which would suit you best. Here’s a handy guide to help you quickly decide which option might be your best bet.

Related: Gas Vs. Electric – A Heated Debate

Cooktop Benefits:

• Cooktops require a much smaller cutout in your counter space, and are surrounded on all four sides, leaving ample room for cabinet space below.
• Because there isn’t an oven below it, you don’t have to stand by extra heat (which usually radiates from the oven) if you use both appliances at the same time.
• Purchasing an oven separately gives the option for you to select a single ordouble wall-mounted unit.
• Cooktops are also better for people with knee or back problems because their accompanying ovens are more at arm height.
• If you have small children in the house, a cooktop could be a safer choice because the control settings will be out of their reach.
• Glass, or smooth cooktops also make for much easier cleaning, since things like burners don’t need to be removed.
• Cooktops offer more flexibility in burner style, size and options like induction burners.
• Electric cooktops also provide constant, even heat and can maintain very low heat for simmering.
• If your kitchen already has a focal point, such as a window, sink, view or back splash, a cooktop is a good choice so it will let the other features stand out.
• A cooktop is best for multiple-cook scenarios because of separate cooking and baking zones.
• Oven cooking can be more ergonomic: at eye and arm level.

Range Benefits:

• A range is best for small kitchens with limited space because it houses the cooktop and oven in a single appliance and location.
• Ranges are easier to install as well as less expansive, and there are more options at the lower end of the budget spectrum.
• If your kitchen needs a strong focal point, a range can help bring the room together.
• There are several different types, sizes and cooking styles available, including freestanding, slide-in, drop-in, double oven and dual-fuel ranges – all at an added cost.

Our Favorites:

Now that the breakdown above has given you a sense of what fits your needs best, let’s take a look at some of the best options in each category. Of course, there is a huge variety of features you can choose from, but these top models have proven themselves time and time again. Our top 3 favorites come from scouring sources like Top Ten Reviews, Consumer Reports, Reviewed.com and our own personal experience.

Cooktops:

Whirlpool Gold cooktop
Whirlpool Gold GCI3061XB

This 30” induction cooktop costs the same as a regular electric cooktop but offers additional benefits, such as direct cooking, responsive control, quick boiling, energy efficiency and consistent low temperatures. Its smooth, sleek design and flattop controls makes for easy cleaning as well. (Est. price: $1,209–$1,349)

GE Cafe cooktop
GE Café CGP650SETSS and CGP350SETSS

Coming in both 30-inch and 36-inch designs, this first-class cooktop features stainless steel trim, illuminated controls, continuous cast iron grates and a Lodge griddle. Outperforming the competition on almost every metric, the high temperature was strong enough to sear a steak, while the low was light enough to melt and simmer. If you’re after the best of the best, you simply can’t beat the GE Café. (Est. price: $1,499–$1,599)

Electrolux cooktop
Electrolux EI30EC45KS

With touch controls and curved stainless steel trim, this 30-inch electric cooktop is the epitome of modernity. Boasting a wide range of temperatures and quick boiling times, the Flex-2-Fit element offers three separate sizes to match your collection of pots and pans. On the other end of the spectrum, this cooktop was able to reach temperatures as low as 86ºF – perfect for simmering. (Est. price: $1,073)

Ranges:

Frigidaire range
Frigidaire FGGF3054MF

Highly affordable, Frigidaire’s new FGGF3054MF comes with five burners, continuous cast iron grates with an optional griddle, true convection, a temperature probe, quick preheat times, a fast boil, low simmer temperatures and superb baking. Now that’s value. (Est. price: $949–$1,149)

Amana gas range
Amana AGR5630BDW

When it comes to basic gas ranges, the Amana AGR5630BDW is as good as it gets. Sure, cheaper ranges exist, but none of them match this one’s cooking performance, contemporary design and digital controls. Chock -full of features, unlike most price-conscious ranges, this one offers a self-cleaning option, a storage drawer, a broiler, Easy Touch electronic controls, Temp Assure™, four sealed gas burners and a versatile cooktop offering power from 5,000 to 12,500 BTU. Plus, when you’re all finished cooking, the Spillsaver™ upswept cooktop makes for an easy cleanup. (Est. price: $549)

LG double-oven range
LG LDE3037ST

This beautiful double-oven range comes with its own suite of unique technology. Besides being able to bake multiple dishes that require different temperatures at the same time, it also has a quick-heating infrared broiler, an EasyClean coating that makes self-cleaning cycles more effective and top-of-the-line temperatures and boiling times. What does all that mean for you? It’s one of the best cooking experiences money can buy. (Est. price: $1,625)
In Conclusion

Now that you have a good sense of the differences between a cooktop and a range, the benefits and some of our favorites, you’re well on your way to creating your perfect kitchen. But don’t let those new appliances go unprotected. Protect your budget form unexpected repairs and replacements with a Home Warranty Planfrom American Home Shield®. Happy cooking!

Originally Published by AHS (American Home Shield)